Thursday, October 15, 2009

Some new listings using old beads

Thanks Tina, for posting a comment about the size of photos on monitors!

Okay, let's see… what green things have I done lately? I haven't done too much of anything, green or not, because hockey has occupied me for many days in a row. But I should have some time this weekend to work on more projects.

And I have a package from Thompson Enamel at the leasing office… hope I remember to pick it up after my walk home (I'll be listening to the Sharks game on the radio). I don't really remember what I ordered, but I'm sure it will be fun. I also need to find my actual enamels.

Well, at least I got the "Large Handcrafted Bronze Textured Earrings" listed.


And then drawing from my bead stash, here are other new listings...

Faceted Amethyst and Citrine Large Beads Necklace with Sterling Silver


Turquoise and Sterling Silver One of a Kind Necklace


Bracelet of SRA Boro Lampwork Beads in Green with Blue Accents and Swarovski Crystals


Bold SRA Lampwork Glass Art Beads Bracelet in Red and Black with Bali Sterling Silver


And I got started on the listings for my new idea.

Oh, here are two large silver beads I made… they are sub-par so I'm keeping the bracelet for myself, but I do plan to try this some more. I like big beads.


Okay, I'll be back later with more updates of green stuff. TTYL!

Saturday, October 10, 2009

Color Correction in Adobe Photoshop (and/or Elements)

Melanie-Pearl said... oh geez! you have downstairs neighbors? haha. it's a good thing you stick with metal clays! if you get a stump be sure it was cut awhile ago or leave it out to dry for awhile. otherwise it will mold on your floor.

thanks for all of your photos ideas and for sharing your secrets! i would never have known what a difference this stuff makes without seeing it illustrated on your blog. i am still amazed.

as usual, one hobby leads to another...guess I get to learn more about color correcting, etc. now.


Well, I’m glad I have something that I can share with people. I’ve picked up so much from the internet, books, classes, etc.

But wow… that photo on your October 8th blog entry. What a gorgeous creation!

Anyway, here’s a bit of how I do my color correction.

As mentioned in a previous post, I put a small, stark white piece of “something” into the frame of each jewelry photo I take (in the example photo, I used an earring card).


I have done nothing to the above photo other than make it a size that fits here. Otherwise, it’s raw, straight from the camera.

I do CTRL+L, which brings up a “levels” pop-up box. If it’s in the way, you can just grab the top and move it over out of the way.


You can see three eyedroppers on the right-hand side of the pop-up. The left eyedropper represents black, the middle one is gray, and the far right one is for white. White is the one I use most often.

Click on the white (far right) eyedropper, then click on an area in the photo that is supposed to be white. I often try a few different spots, while keeping my eye on the jewelry, reminding myself that what I’m after is for the jewelry to be the same color and shade in the photo as the jewelry that is right there next to me at the computer with a good light (preferably OTT) on it so I can see it clearly and accurately.


The rest is just cropping and adding a watermark, etc.

Here’s what before and after look like together.


The concept behind “color correction” is that you are putting something into the photo that you can tell the photo software exactly what color it is. So instead of having to tell the software exactly what shade of yellow that bead is. You just say, “See that? That is white. Make THAT white and everything else will become properly colored according to it.”

Make sense?

Wednesday, October 7, 2009

More Details on My Photo Set-Up

Melanie-Pearl said... Wow! What a remarkable difference! It looks like a totally different bracelet. Did you take that photo on a plain piece of paper---Hope you don't mind me asking--- or is that some effect that makes it look mirrored?

Thanks, Melanie! And no, I don’t mind you asking at all. I love sharing techniques for doing things.

The top photo was taken on my usual gradient paper (which I’ll explain in a second)…


... while the photo underneath it was taken on an actual stand (details to follow).


The thing that impresses me, though, is that the bracelet itself seems to have better focus on the bottom photo.

In this photo, you can see the entire sheet of gradient paper.


So, the details…

I made the gradient paper myself (after months of searching in art supply and craft stores… I probably should have tried photography stores).

Here’s the URL for it if others want to try printing one off quickly.

http://srajewelry.com/Blog/gradient2.jpg

It may look “weird” on your computer monitor… but I think if you right click on it and save it to your hard drive before printing it… well, I don’t really know… maybe it works either way just fine.

Anyway, I print on glossy photo paper.

The second item I shoot on is a slightly reflective “stand”. Let me go see if I can find the vendor….

Ah… it’s the “silver riser” from Table-Top Studios.

BTW, that’s a great idea in your about the tree stump. I just realized my downstairs neighbors probably have no clue what I’m doing on “hammering nights”. Eek!

Monday, October 5, 2009

Lots of Enameling Questions and Thoughts

So… I wanted to finally try enameling. Not the kind I'd done before (on glass beads), but on metal… like my own metal creations.

So this weekend I made some bronze bases that I will try enameling on. I know copper is more traditional, but is there a REASON bronze wouldn't work just as well? I will research this before trying it. (ETA: So far, the only reason I could come up with for not preferring to enamel on bronze is that the translucent enamels might get cloudy… but I think that was if there's zinc in the alloy… if it's just 90% copper and 10% tin, this might not happen anyway. Now, seeing as how I favor the opaques, I'm going to continue on with my experimenting.

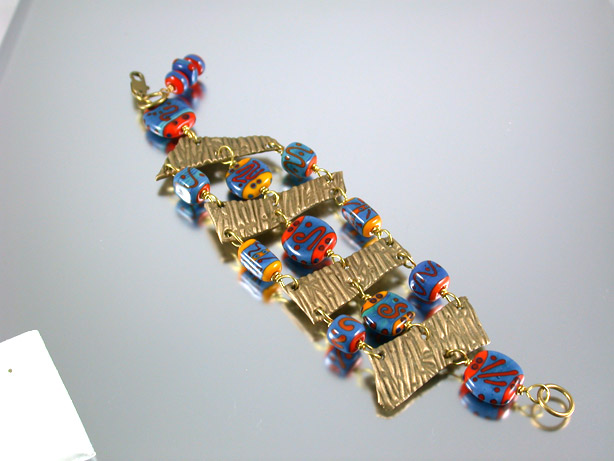
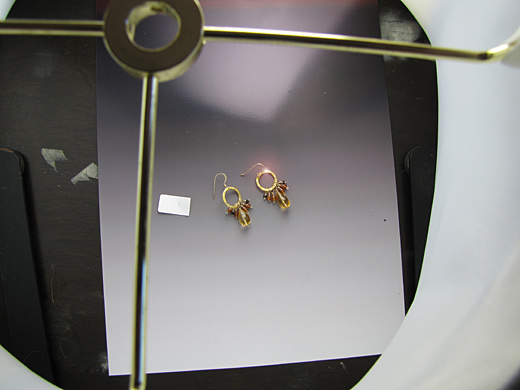
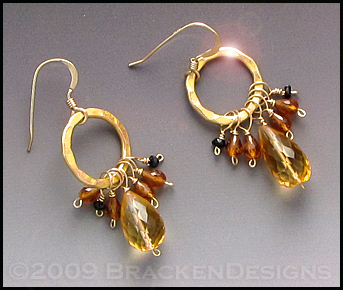
Here, btw, is a photo I took of one pair of earrings that came out of the kiln this morning. The photo is with my phone… I'll take a much better photo before listing these (unless I decided to experiment with them instead of sell them).


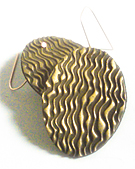
It's a small(ish) photo because I was trying to make the picture the same size as the earrings.

But while we're on the subject, I'll ask a question: will a fixed sized photo be the same size on everyone's monitor? Like, if the beads in those earrings are 1¾ inches tall and I make my jpg so that on MY computer, the earring beads in the photo measure 1¾ inches on my monitor… will they ever be NOT 1¾ inches on someone's monitor?

Anyway, back to enameling… I did want to try torch enameling prior to kiln enameling for two reasons. One, I didn't want to ramp my kiln all the way up to 1500 for a few minutes of work at a time… and two, I really need to be able to SEE the enamel so I can get a feel for how long to fire it.

I was happy to see that my Messermeister culinary torch goes up to 2700 degrees. That's what they say, anyway. Shrug. Maybe a little kitchen torch is okay for tiny pieces. We'll see.

Some basic questions I have about enameling probably seem ridiculous to seasoned enamellers, but they are just things I either don't get or want to be sure of.

Like… you do multiple sets of coating/firing. If you're not doing counter-enameling, do you just leave the back side black until after the final firing or do you have to clean it between each firing?

Also, if different enamel colors require different firing times, then I'm assuming you don't put all your colors on and fire them all at once, right? But you also can't do each one separately because when you go to fire color 2, you'll be messing up color 1, won't you?

Thursday, October 1, 2009

More about my do-it-yourself photo cube

Due to the overwhelming positive response to my last entry, tonight I’m going to expound on the photo cube a bit.

Here are two photos of the same bracelet. The first photo was shot with my previous $100 photo cube:


The second with the new cube:


The difference may appear slight, but to me the second shot is MUCH closer to what I’m after. I wasn't happy with the inability to achieve very fine focus with my previous tent... and I think it's because it was so large that the light sources were too far from the object, thus messing up the focusing ability of the camera (I can't use manual focus because of my weird eyesight… don’t ask).

So a clear photo is all I care about, really. The low price of the new photo cube was just a bonus.

Lampshades come in all shapes and sizes; I may pick up a second one for a slightly different effect. The only thing I had to make sure of was that the metal crossbars were flush with the top of the shade...

Like this:


Rather than recessed like this:


Here is one of my shots, without any photo-editing yet... this is just how it comes out of the camera... so you can see my set-up.


The camera is on a tripod and I shoot pretty much straight down into the lamp top.

The piece of paper in there is regular 8x10 inch.

I use something dead white in the shot (you can see it next to the earrings) so that I can color correct.

My camera lens, although set to macro, is still a good 10 or so inches from the earrings.

But because I can get my lights so close to the earrings, here's how the photo turns out...